The Huntron Workstation software has had a long life in various forms since its introduction in the mid 1990’s. Along the way it has matured and grown into more than simply a way to control a Huntron Tracker with a PC. Let’s take a look at how Huntron Workstation started, where it is now and also look a bit into its future.
Capture, Store and Compare
In the beginning, the primary goal of Huntron Workstation was to control a Huntron Tracker so you could capture the analog signatures (V/I waveforms) of electronic circuits and store them on a computer. Having the signatures stored on a PC allowed you to use them later for comparison. This allowed you to compare the signatures of good circuit boards to those of bad circuit boards hoping that the differences would lead you to the problem. Your classic good vs. bad troubleshooting method.
As a side benefit to this capture/store capability was having the information organized in a database that provided a repeatable test process. A test for a circuit board would be created and used the same way by all of the technicians and engineers who accessed it. This essentially provided a way to “share the knowledge” rather than having to remember it in your head or write it down in some logbook. Capturing and storing test data is the first level in test automation that makes our job a lot easier than having to document information by hand.
The first versions of Huntron Workstation were created for Microsoft Windows 3.1 and as operating systems, PC specs and the electronics industry changed, Huntron Workstation did as well.
Robots
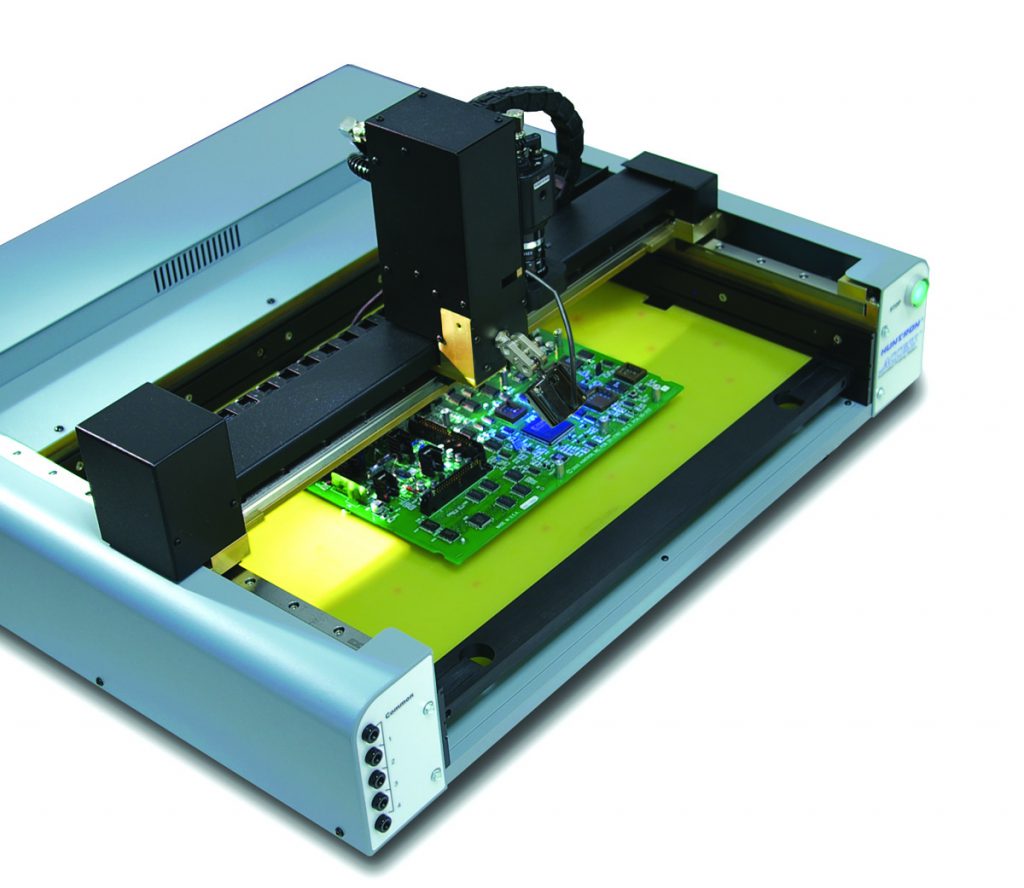
In the early 1990’s, Huntron saw the growing trend of surface mounted electronics become more prevalent in its customer base and the clip and cable approach used for so many years was becoming less useful as electronic components became smaller. The growing frustration of troubleshooting these tiny components led Huntron to develop its first robotic Prober. It was specifically designed to be used by technicians and engineers to test circuit cards the same way they did before but using a “mechanical hand” rather than a human one. The Huntron Probers were and continue to be simply a method to automate the testing of small components on a circuit board so you don’t have to do it manually.
Of course the software that is used to control the robotic Probers is Huntron Workstation. The Probers are a straightforward XY platform that put a probe where the test tells it to go. They do not have a great deal of built-in intelligence relying on the user and Huntron Workstation to tell it what to do. Since the first Huntron Prober, Huntron Workstation has been the brains behind all of the various robots including the current dual head systems.
However, with that first robotic system, some of the earliest comments we received from customers were “Hey, can I hook my ‘scope to that thing?”. Well, it took some time but Huntron finally saw the real Power of Huntron Workstation.
More than just Huntron Tracker software…
As Huntron Workstation became more powerful we realized that we had more than just a software package for capturing Huntron Tracker signatures. We had a way to create a repeatable test process, control a test instrument, capture a measurement at a specific point, store that measurement and then compare that measurement to another one. Did it really matter if the instrument was a Huntron Tracker? The short answer was no.
The first “external” (meaning non-Huntron) test instrument Huntron Workstation supported was the Tektronix 4050 digital multimeter (DMM), a benchtop, serial controlled DMM that is still quite common on many test benches.
With input from customers and requests from manufacturers the list has grown and Huntron Workstation currently supports nine “external” instruments. Here is a quick rundown:
– Tektronix 4050 general purpose benchtop DMM
– Agilent/Keysight 34410A general purpose benchtop DMM
– Keysight 34461A general purpose benchtop DMM
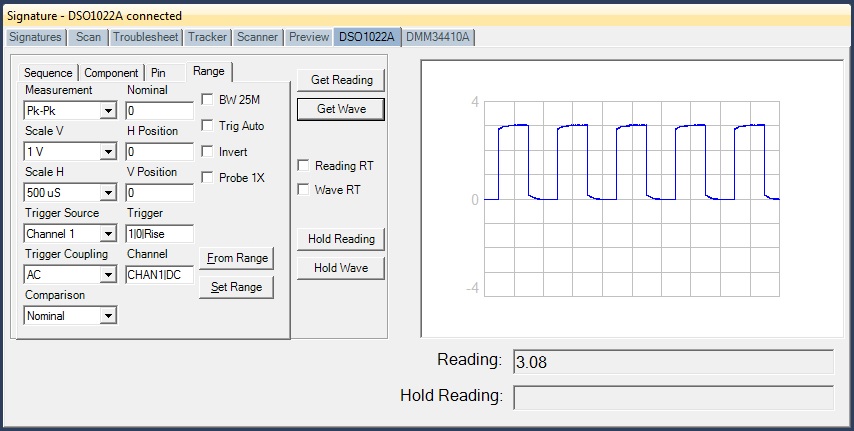
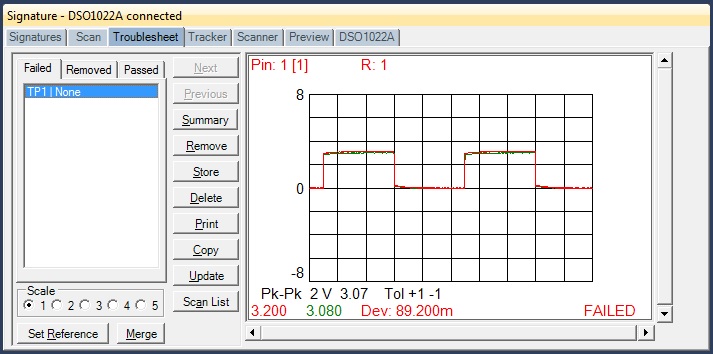
– Agilent/Keysight DSO1022A general purpose oscilloscope
– Keysight DSOX2022A general purpose oscilloscope
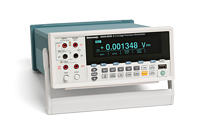
– B&K Precision 2841 DC Resistance Meter (milliohm 4 wire measurements)
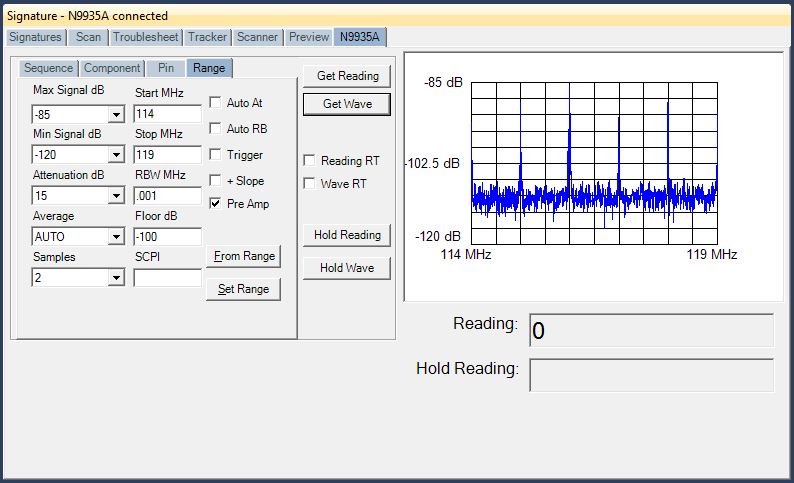
– Keysight 9935A FieldFox 9Ghz. spectrum analyzer
– Keysight 9938A FieldFox 26.5 GHz. spectrum analyzer
– Rohde & Schwarz FSH4 spectrum analyzer
These instruments are integrated into Huntron Workstation by adding an included DLL file that enables a particular instrument. Once the DLL file is added, Huntron Workstation automatically includes the instrument in its interface. It is essentially just another instrument like a Huntron Tracker.
Capture, Store and Compare in the 21st Century
Okay, time to get a bit more technical.
Support for the non-Huntron instruments is included with most of the Huntron configurations (Tracker 3200S, Access Prober systems). Once installed, the instrument can be selected as the test device and test creation is the same whether you use a Huntron Tracker, DMM, oscilloscope or spectrum analyzer.
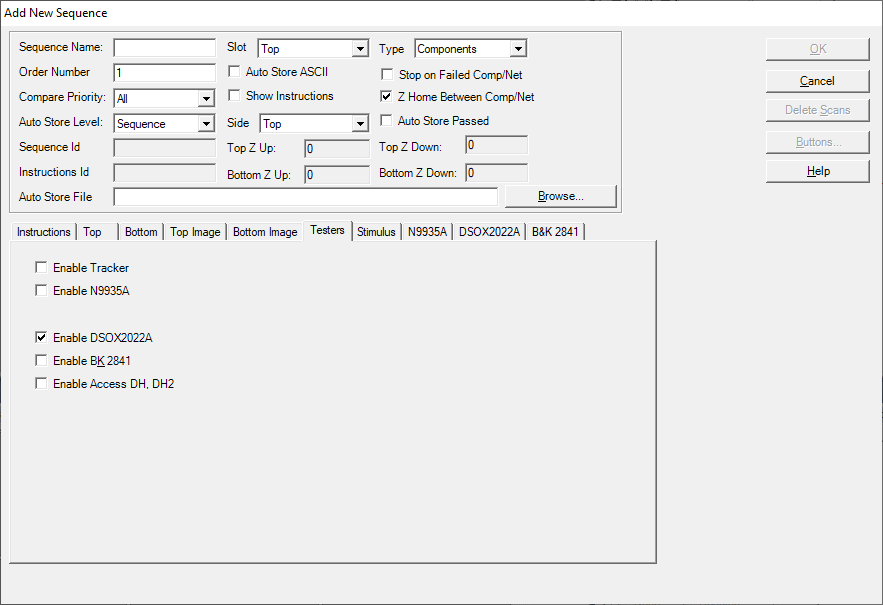
We will not go into how the test created here as there are plenty of available documents and videos that explain the process.
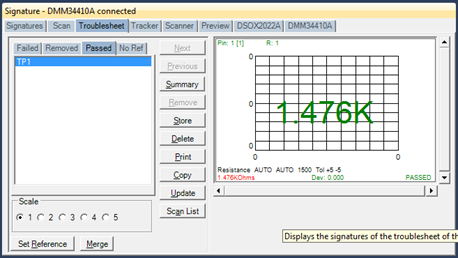
The test comparison can be setup for external instruments in one of two ways. The first is to compare to a nominal value for each point tested. For example, if a 5.0VDC test point is measured then the nominal value in the test can be set for +5.0VDC. The test will pass if that value is measured. However, when taking measurements in-circuit such as resistance values, you may not be able to predict a nominal value. In this case you would set a “Reference” comparison value based on the measurement captured from a working assembly. For example, if the resistance at a test point on a working circuit card is captured at 1370 ohms, that value is set as a Reference value. When testing subsequent circuit cards the test will pass if the comparison matches the 1370 ohms Reference value. This is basic comparison troubleshooting made easy by having the Huntron Workstation software do the work for you.
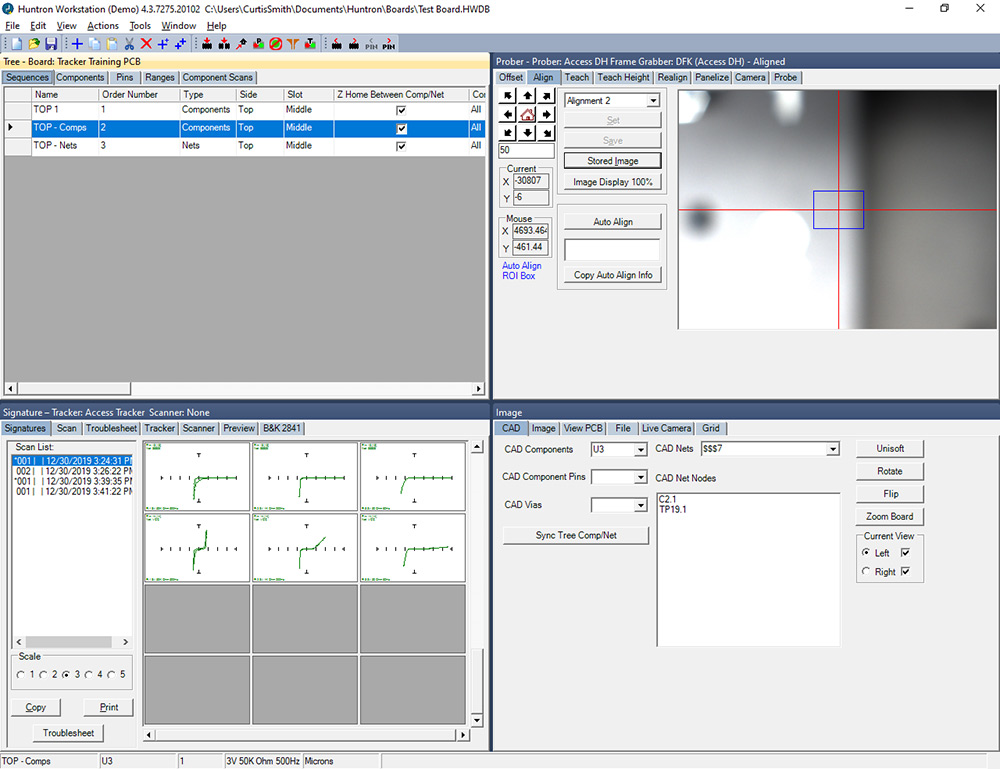
Here are some screen captures from tests using these instruments to give you an idea on how they are presented.
Future versions of Huntron Workstation will certainly include additional support for other test instruments. We generally get feedback from customers that help us decide which instruments to consider. If you have an opinion, please let us know!
We are also looking at other less traditional types of comparison test such as visual inspection. Imagine if you could capture images of key locations on a circuit card and use them for later comparison when troubleshooting a suspect circuit card. It is all fair game in our book as we strive to make Huntron Workstation a powerhouse in the circuit board testing arena.
Huntron Workstation is fairly unique in that we do not know of any other software package that helps engineers and technicians automate the capture, store and compare process more completely and with support of a wide variety of test instruments. Adding a robotic solution such as a Huntron Access Prober and the process is completely automated. Yes, maybe we are patting ourselves on the back a bit but we feel that the real power in Huntron Workstation is helping you do your job more effectively.
Thanks for reading!
One response to “The Power of Huntron Workstation – Capture, Store and Compare Electronic Measurements”
Excellent. Very Good work.
Kind regards to all.
Kostas v. Kassioumis