Huntron has been making the Huntron Tracker for 45 years and flying probers to automate electronic test processes for 30 years. Trackers have traditionally used manual probes to interface to test points on printed circuit boards (PCB). Because of the growth of surface mounted electronic devices (SMD), we introduced our first robotic flying prober in 1991. Using a flying probe to test very small SMDs made a technicians job much easier by being faster and more accurate than probing by hand. However, when comparing manual versus automated PCB testing at what point does it make sense to shift to automated testing?
We decided to run some realistic tests to find out.
Test Speed Comparison
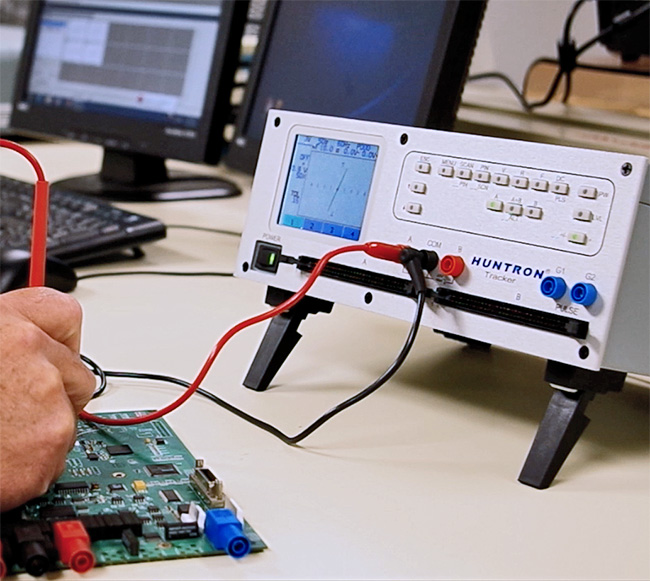
We started by creating tests with the Huntron Workstation software, a Huntron Tracker 3200S and single head Access Prober for capturing voltage vs. current signatures (VI test). Each test has an increasing number of test points using three Tracker ranges. All aspects of the process were considered for a fair comparison between manual and automated probing. We included test development and execution times for each test used. Our resident Technical Support guru created and ran each test trying to execute each step as efficiently as possible while trying to minimize any mistakes.
Manual Test System
The system used to execute the manual tests consisted of a Huntron Tracker 3200S controlled through Huntron Workstation. Since the user will need to hold the test probes, a footswitch was used to allow the user to increment the test without using the mouse or keyboard. The footswitch connects to the Tracker and essentially mimics pressing the “OK” or “Next” button in the software.
Automated Test System
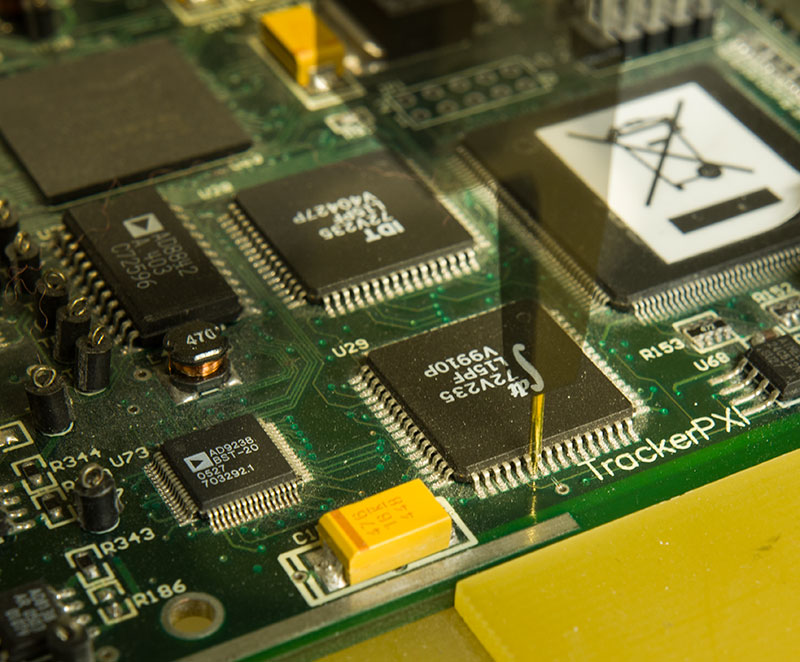
A Tracker 3200S connected to a Huntron Access Prober executed the automated tests. Test development time was longer since the developer teaches the software where the probe will be placed. An Access Prober uses a camera based teach system where the user sets the location of the component pins.
The Tests
Here is a breakdown of each test.
Test 1: Five 2 pin components for a total 10 test points
Test 2: Ten 2 pin components for a total 20 test points
Test 3: Ten 2 pin components and two 16 pin ICs for a total 52 test points
Test 4: Ten 2 pin components, two 16 pin ICs and one 64 pin SMD IC for a total 116 test points
Test 5: Ten 2 pin components, two 16 pin ICs, one 64 pin SMD IC and one fine pitch (0.65mm) 20 pin SMD IC for a total 136 test points
The 20 pin 0.65mm SMD IC was added to Test 5 as a test of our Technical Support guru’s dexterity. Hand probing a device with such small pins requires a slower approach and most likely a magnifying glass.
The Testing Results
Below are the timed results for manual versus automated PCB testing. The manual test results are displayed in blue and the automated results in red. The Test Development Time is considered an unavoidable “up front” cost of PCB test. Automated tests have longer development times but the benefit is realized with the time savings when running the test.
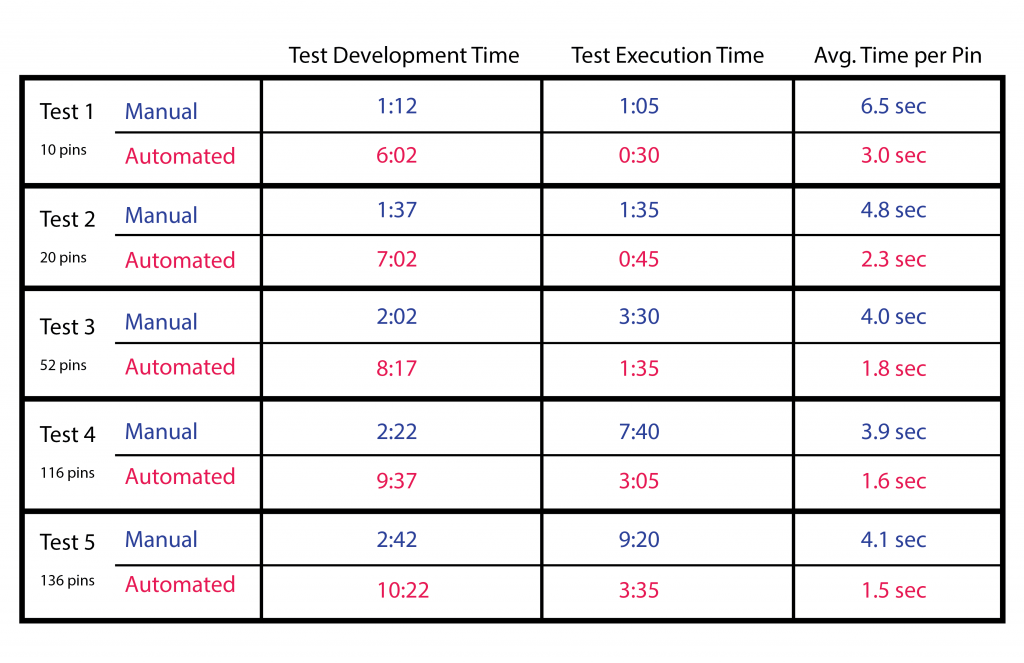
The timed results were not surprising showing the manual tests slower than the automated tests. The first two tests with 10 and 20 pins showed that manual testing was not significantly slower so would be a good option for a small number of pins. However, when moving to the IC components the automated test showed its strength especially when testing fine pitch devices.
The Average Time per Pin results are a reflection of test efficiency. Note that as the number of pins increases the average time decreases. This changes for manual testing during Test 5 when probing the 0.65mm SMD device is added. These devices require a more deliberate motion and accurate placing of the hand probes therefore slowing down the process.
Conclusions
An evaluation of the test results shows that manual probing a small number of components can be a reasonable choice. The capital cost of test automation equipment may be prohibitive so manual probing may be the only option for some. Investigate the cost of labor to help with the decision between manual versus automated PCB testing. For example, if your technician labor rate is $100.00 an hour then the cost to execute Test 5 manually is roughly $16.00. The cost to run the automated test calculates to about $6.00 but the technician can be busy with other tasks while the test is running. Manually testing more complex PCBs with many more components can be labor intensive and the possibility of mistakes increases. As a result, the point will quickly be reached where manual probing does not make financial sense.
There are many costs to consider when comparing manual versus automated PCB testing. Companies that have adopted automated testing looked at the return on investment (ROI) numbers including PCB replacement cost, time to repair PCBs and parts and labor cost. You get the best ROI when testing complex, expensive, SMD populated PCBs.